How to Install and Launch an AI Orb Sales Assistant on Your Website
📘 Background & Purpose
This SOP shows how to install a clickable AI “orb” chatbot on your website. The orb interacts with visitors as a sales assistant that can conduct a roleplay demo and even book appointments. This allows any website to have a dynamic AI rep customized for any industry (e.g., solar, mortgage, AI services).
🧰 Resources Needed
-
Access to your web builder (e.g., GoHighLevel)
-
Assistant ID (to duplicate a working AI orb)
-
Calendar (for appointment bookings)
-
Twilio (for assigning a phone number)
-
Embedding access to your site
-
Voice selection (optional customization)
📋 Step-by-Step Instructions
Part 1: Create Your Assistant
- Go to the Assistants sections, Click “Create New”. You can choose to use the Generate Assistant feature, Import With ID, or Blank Canvas. (If you are interested in the self-selling demo, you can choose Blank Canvas and copy the prompt from Self-Selling Orb Demo)
-
Select your AI voice (e.g., Emily or Grace).
-
Link a calendar to allow appointment booking.
-
Enable all calendar permissions
Part 2: Buy and Assign a Phone Number
-
Click to purchase a phone number via Twilio.
-
Choose any number (zip code does not really matter since customers will not be seeing the number).
-
Assign it to your assistant.
-
Click Save.
Part 3: Create the Widget (The Orb)
-
Navigate to the Widgets section.

2. Click Create Widget > select Floating Orb.

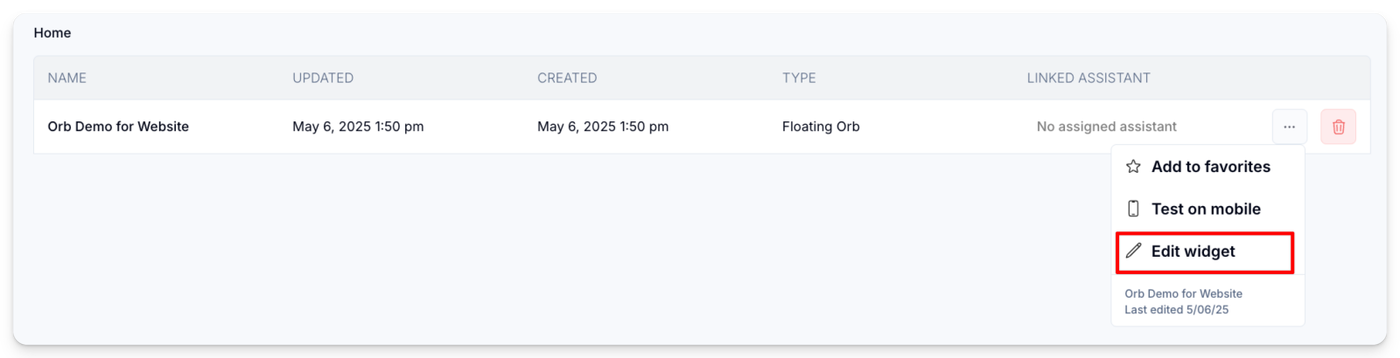
3. Name it (e.g., “Orb Demo for Website”).
4. Click on the three dots to the right of the newly created widget and click on Edit Widget.
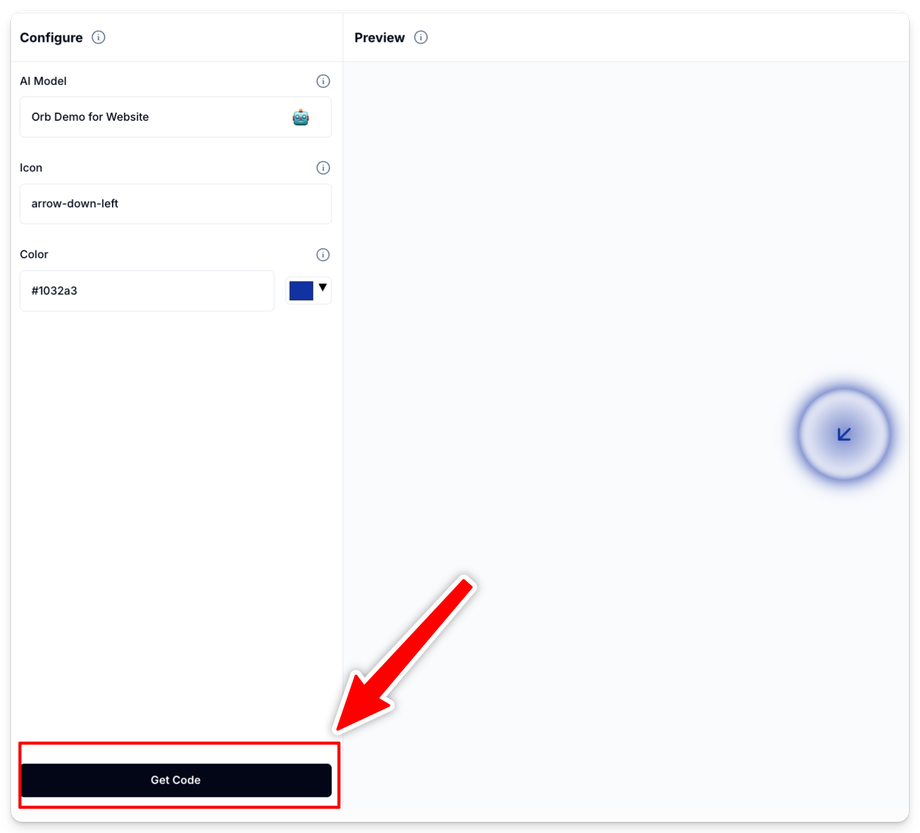
5. In the Widget configuration settings, under AI Model, assign the widget to the assistant that you created in Step 1.
6. Customize:
-
-
Icon (e.g., phone or robot)
-
Color (optional)
-
7. Save Changes
Part 4: Embed on Your Website
-
Click the “Get Code” button at the bottom of the screen and copy the code.
-
Go to your website builder (e.g., GoHighLevel).
-
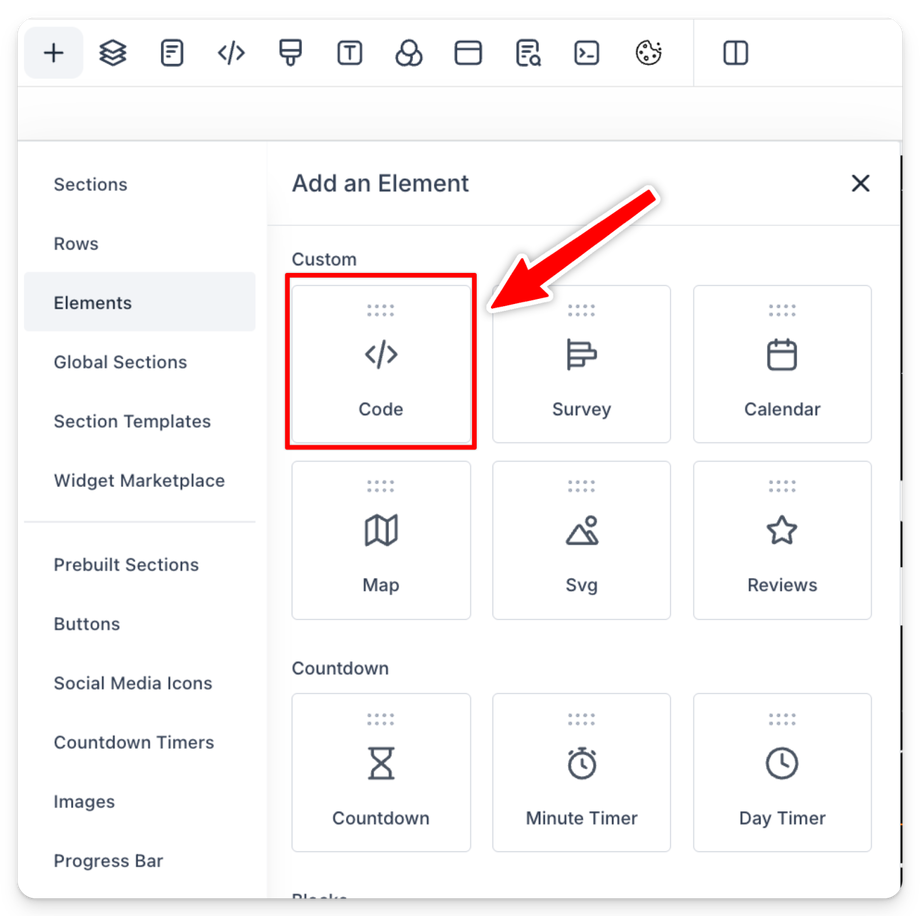
Add a new Custom Code Element. If you are using GoHighLevel, it looks like this:
-
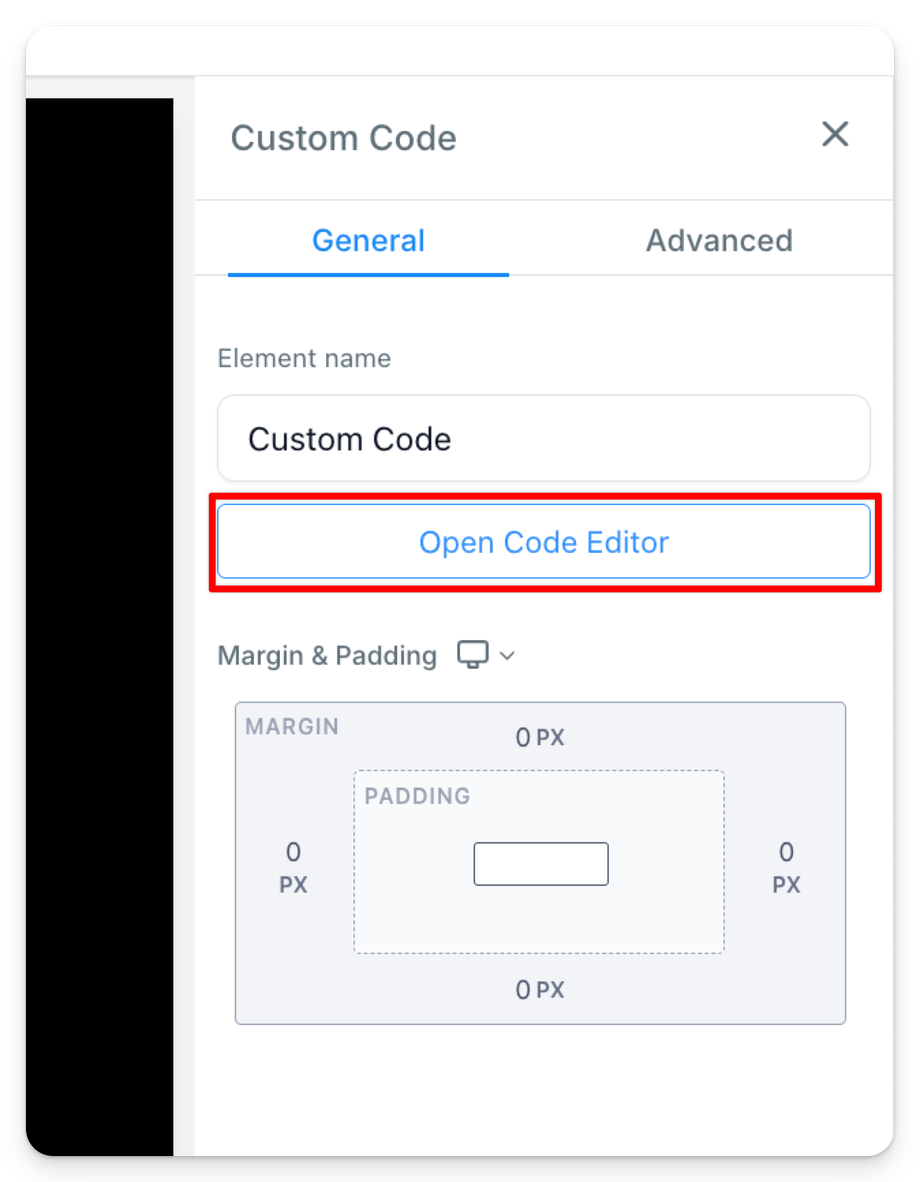
Click Open Code Editor and paste the embed code.
-
Save, Save Again, and Publish your site.


Part 7: Test It
-
Visit your live site.
-
Click the orb – it should launch your AI assistant.
-
Speak or type to begin the roleplay.
-
Confirm voice and booking function are working.
🎥 Video Tutorial
❓ FAQs
-
Can I customize the assistant script?
Yes, just edit the prompt and response rules in the assistant settings. -
Do I need to code anything manually?
No, just copy and paste the embed script. -
What if I want to change the voice?
You can choose from a list of voices at setup. -
Will the orb show the phone number?
No, it’s hidden since it only runs on the site. -
Does this work on non-GoHighLevel websites?
Yes, any site that allows you to embed HTML.