Importing Numbers
Background and Purpose
This is a comprehensive guide on importing numbers into the system for your AI assistants to use for both inbound and outbound calling.
This is the way to integrate with your telephony provider that supports elastic SIP trunking. You will need to set up a SIP trunking and configure your number to point to it, and then import that number to the AI system.
We will use Twilio as an example here. You can use other telephony providers that support elastic SIP trunking as well.
In this context, the elastic SIP trunking is used to connect our VoIP with PSTN so that your AI can make and receive calls.
Let’s get started ⬇️
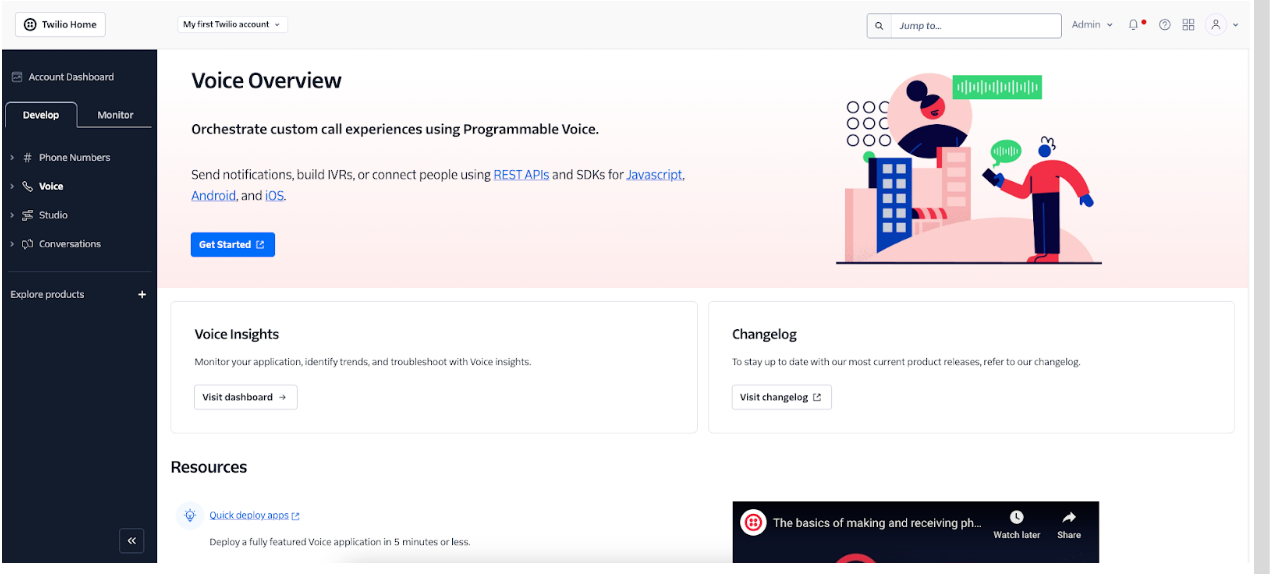
1. Navigate to twilio.com (console.twilio.com) and you should see a similar page to the screenshot below:
2. Navigate and click on “Explore products”:

3. Next, on the menu for products - we need to click on “Super Network”:

4. We need to click on “Elastic SIP Trunking” - this is how we will be able to automate inbound and outbound calls on your behalf:
5. Now, we should be at the “Elastic SIP Trunking Dashboard”. Click “Get Started” right under the main header on this page:

6. Click on “Create a SIP Trunk”, then give it a name. Then click create:

7. Let’s toggle some general settings - enable Call Recording here (Record from ringing), enable Call Transfer (SIP REFER), and set Caller ID for the Transfer Target to be the caller ID as transferee. Click save button in the bottom left:

8. Now, set up termination (this is for outbound). Click on Termination over on the navigation menu to the far left (in screenshot). The termination SIP URI important. We would use it in later steps so save this for later:

OUTBOUND CALLING:
If these steps are not followed correctly, we will not be able to process outbound calling.
9. For your elastic SIP trunk to accept our outbound request, you need to whitelist some IP addresses:
- Click on the “+” button next to IP Access Control Lists under Authentication (its like right below what we just did)
- Create the first list:
Friendly name: default ACL 1
Address: 0.0.0.0 / 1
- Create the second list:
Friendly name: default ACL 2
Address: 128.0.0.0 / 1
Click the blue save button in the bottom to the left:


INBOUND CALLING:
If these steps are not followed correctly, we will not be able to process inbound calling.
10. Go to Origination right underneath where we clicked on Termination. Then, add our origination URI:
Origination URI (For you to copy): sip:5t4n6j0wnrl.sip.livekit.cloud

Importing a number to use:
Ok, now you have your cool new AI calling trunk to put numbers. So, in the top right corner, click on “Add a number” and either buy a number or add an existing number. If you buy a number you still need to click on add existing to add it to this trunk.

We need the number in raw format (+country code, then number with no space, no special characters) and your termination URI. We need these two things to import our number into the system. Get those and move to the next steps.
1. Go to your AI portal and navigate to the number tag in the main navigation or within an assistant - then click on import a number:


2. Input your raw formatted number (+country code, then number with no space, no special characters) and your termination URI - then click import:
3. Then you are good to sync it with your assistants and make outbound calls / receive inbound calls for the AI to pick up from that number. We will save your termination URI for you so you don’t have to remember it every time, just bring the number over.