How to Use Flow Builder in Assistable to Build Smarter AI Assistants
1. Purpose
Flow Builder is designed to make your AI assistants deterministic, low-latency, and reliable.
Instead of dumping everything into one big prompt (which causes hallucinations and slow responses), Flow Builder breaks the assistant’s logic into step-by-step nodes that control both the conversation flow and the tools used.
2. Core Principles
-
Determinism → Each step (node) has a single task; the AI cannot skip or improvise.
-
Minimal prompts → Only the essential instructions are given per step.
-
Tools per node → Tools are not global; they’re enabled only where needed, reducing latency.
-
Base prompt + dynamic tasking → Identity and personality remain constant, while task instructions change with each step.
-
Voice & Chat support → Works seamlessly across both interaction types.
3. Setup Process
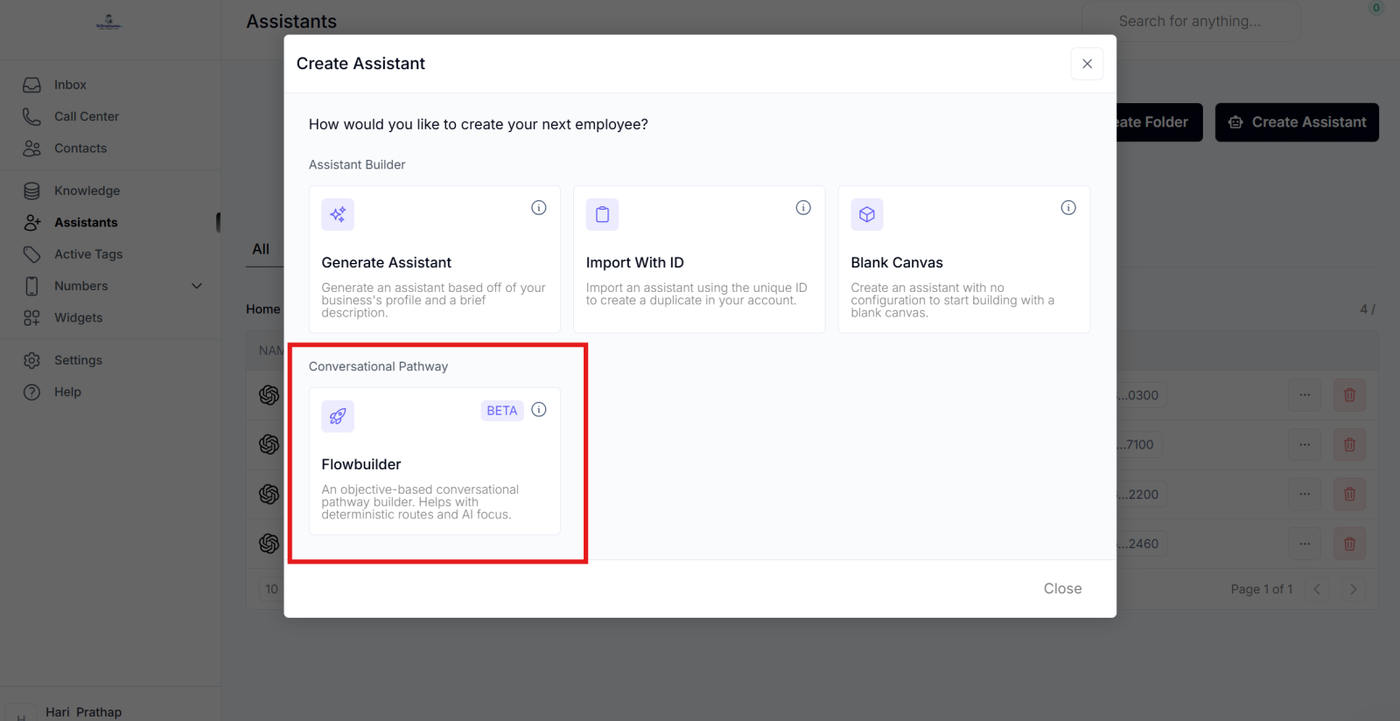
Step 1: Create Assistant
-
Go to Leadindicator → Add New AI Assistant.
-
Choose “Add Flow Builder”.
-
Give the assistant a name & identity (e.g., “Haley – Friendly Scheduler”).
Step 2: Define Base Prompt
-
Base prompt = AI’s identity + guidelines.
Example:
You are Haley, a polite, helpful scheduling assistant.
Always stay concise, professional, and user-friendly.
-
This base prompt applies across all nodes (global personality).
Step 3: Build Flows with Nodes
-
Open Flow Builder → Start Node.
-
Add Nodes (states) for each task.
-
Example for Appointment Booking:
-
Node 1: Ask if user wants an appointment.
-
Node 2: If yes → Ask availability.
-
Node 3: If no → Thank them for their time.
-
-
-
Connect nodes with conditions:
-
“If Yes → Go to Node 2.”
-
“If No → Go to Node 3.”
-
Step 4: Assign Tools per Node
-
Attach tools only where needed.
-
Example:
-
Node 2 (availability check) → Calendar tool.
-
Node 3 (thank you) → No tools needed.
-
-
-
This keeps latency low and prevents misuse.
Step 5: Add Branching Logic
-
For advanced qualification flows:
-
Example:
-
Ask if user is an Enterprise customer.
-
If Yes → Route to Sales Rep Appointment.
-
If No → Send self-signup link.
-
-
-
You can branch into sales, support, onboarding, or multiple departments.
Step 6: Test the Flow
-
Use the built-in simulator:
-
Run a conversation.
-
Verify the AI follows the exact nodes, no skipping.
-
Check tool calls at each step.
-
4. Best Practices
-
Keep each node laser-focused (one question, one action).
-
Use short, precise prompts (avoid long task instructions).
-
Only load 1–2 tools per node to minimize latency.
-
Add qualification filters so only the right users get access (e.g., only qualified leads can book with sales).
-
Use Flow Builder for structured tasks (appointments, support routing, lead qualification). For open chat, prompts alone may be fine.
5. Example Flow: Appointment Booking
Base Prompt (global):
“You are Haley, a professional, polite scheduling assistant.”
Nodes:
-
Start → Ask: “Would you like to book an appointment?”
-
Yes → Go to Node 2.
-
No → Go to Node 3.
-
-
Ask availability → Connect calendar tool → Confirm booking.
-
Thank user → Close conversation.
Advanced Version:
-
If Enterprise → Sales rep booking.
-
If Not Enterprise → Signup link.
6. Benefits of Flow Builder
-
Zero hallucinations → AI cannot invent responses outside nodes.
-
High precision → Ensures only qualified leads/customers reach key actions.
-
Low latency → Only a few instructions + tools processed per step.
-
Scalable → From simple 3-step bots to multi-department enterprise flows.
In Short:
Flow Builder = AI conversations turned into controlled workflows. Think of it as Zapier for AI dialogue — small, deterministic steps, each with its own rules and tools.